
Upgrading KittyCam with Raspberry Pi 3
I was excited when Raspberry Pi 3 came out earlier this year. According to raspberrypi.org, this 3rd generation Pi has faster CPU, WiFi, and Bluetooth 41. and BLE, additional to the previous model.
So I decided to upgrade KittyCam, a cat camera app built with my Raspberry Pi + Node.js project, which and I blogged about a while ago.
At that time, I was using the older Node v0.12.x (pre-IO.js, which I almost forgot about it happened after merged back with Node.js), so I decided to upgrade everything.
Install the Latest Raspbian
Since I got a brand-new Pi3, I install everything fresh, so instead of swapping the SD card from the old Pi, I installed the latest Raspbian build.
Forst, I download the latest Raspbian Jesse from raspberrypi.org to my Mac, then install it in a micro SD card using these instructions using dd tool.
In case you are also a MacBook Air user and don’t know, your MacBook has a SD card slot on the right hand side. But you will need an adapter.

The image is from “SD Cards and Writing Images” by Sparkfun (CC BY-NC-SA 3.0).
Installing Node 4
Last time with Node 0.12, I used the 3rd party node-arm to install it, but now ARM version is officially supported on nodejs.org.
So you can just open up a browser in Raspbian, and download from nodejs.org Download page:
Scroll the page down to Additional Platforms and choose ARMv7 (Note: I think ARMv8 works too, but I installed v7).
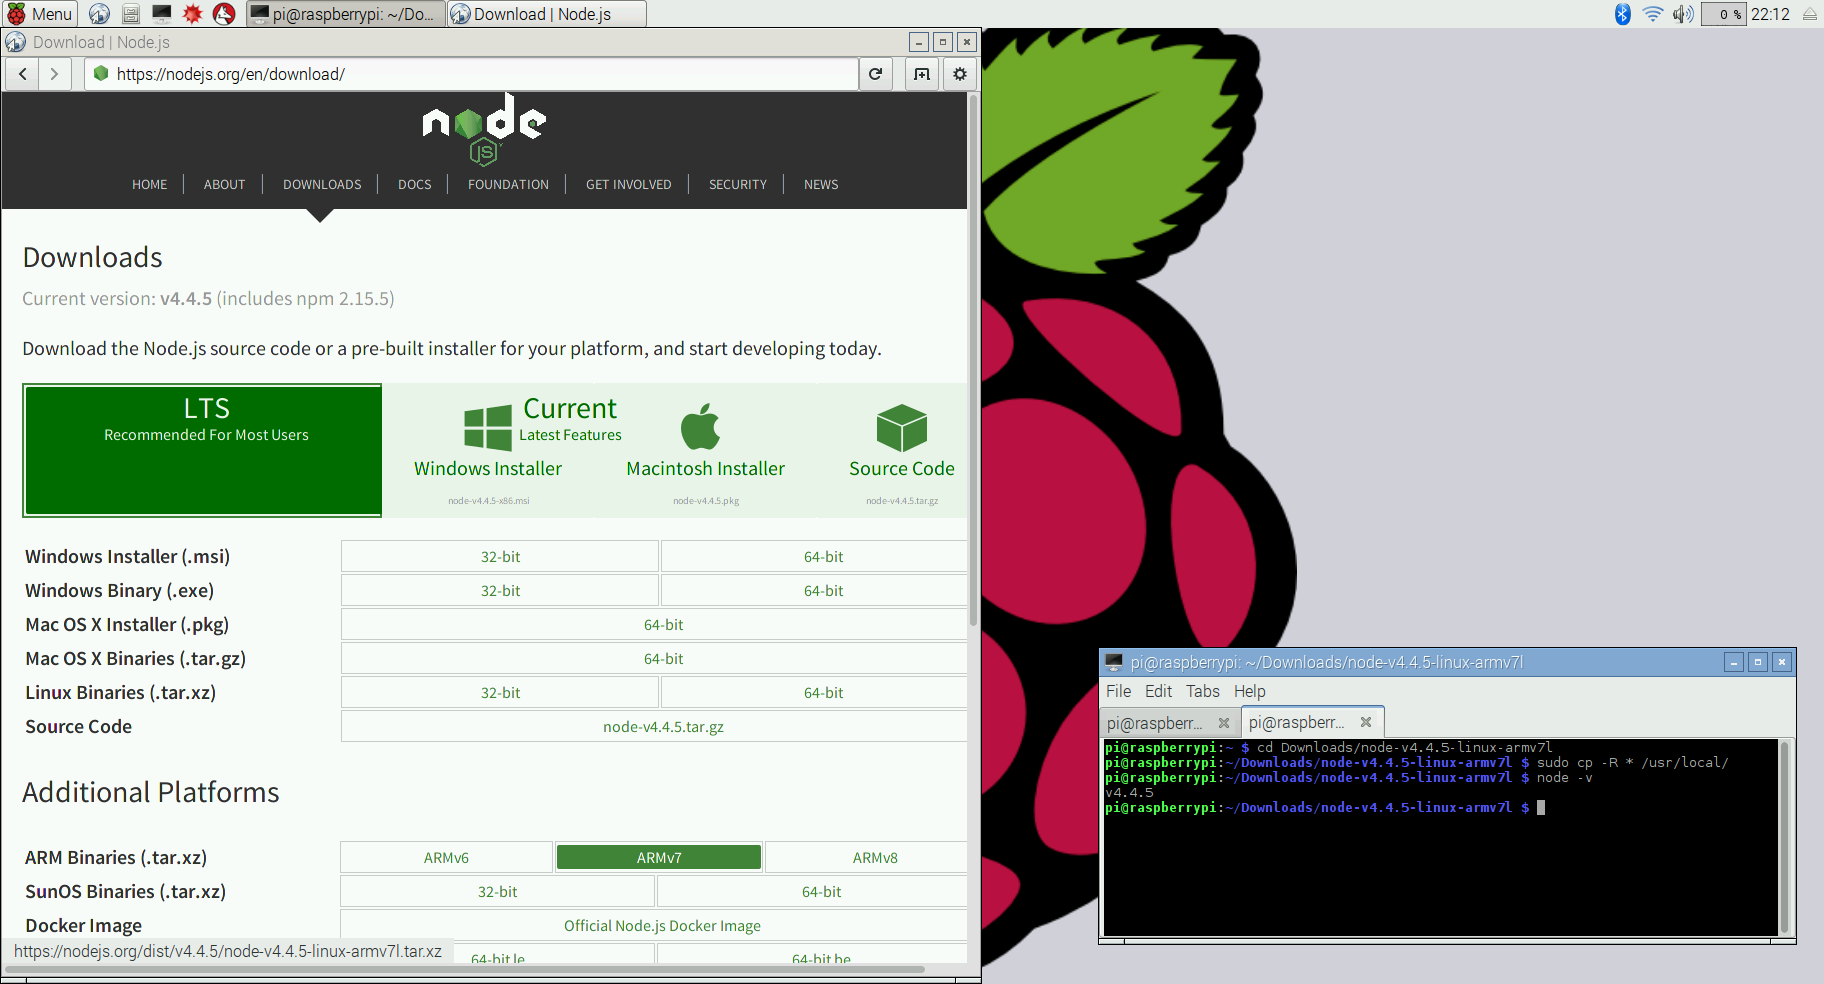
or download and install on terminal as I did:
$ wget https://nodejs.org/dist/v4.4.5/node-v4.4.5-linux-armv7l.tar.xz
$ tar -xvf node-v4.4.5-linux-armv7l.tar.xz
$ cd node-v4.4.5-linux-armv7l
$ sudo cp -R * /usr/local/
Check if Node is successfully installed by checking its version:
$ node -v
If you wish, upgrade npm to v3 too.
$ npm install -g npm3
Installing Updated Dependencies for KittyCam
Create a KittyCam directory and copy everything except package.jsonfrom KittyCam repo. But also keep the node_modules/kittydar because installing kittydar using npm, and use it as is will fail, when you install Node-Canvas. (or tweak kittydar’s package.json manually!)
Installing Cairo
Get Cairo on your Raspbian bore installing Node-Canvas:
$ sudo apt-get install libcairo2-dev libjpeg8-dev libpango1.0-dev libgif-dev build-essential g++
Once set up with Cairo, in KittyCam dir,
$ npm install canvas
Installing Johnny-Five
Also, since the last time I created KittyCam, Johnny-Five and the IO-plugin for Raspberry Pi, Raspi-io have been upgraded a lot too. So just install the latest manually:
$ npm install johnny-five --save
$ npm install raspi-io --save
Installing All other Node Modules
and all other node modules used for KittyCam. In the app, I am also using Cloudinary and PubNub. You can install both with npm too.
Hardware Wiring
I have not updated any hardware besides Pi.
When you hook up with a camera, make sure to enable the camera module from the Pi Software Config Tool.
$ sudo raspi-config
Now, everything should work with Raspberry Pi 3!
I had chance to test it out while I was taking care of my friends’ cats!
I have given the talk about KittyCam in a few conferences and meetups so far, such as NodePDX in Portland and ForwardJS in San Francisco. My slide deck is available on SlideShare!
- ← KittyCam - Building a Raspberry Pi Camera with Cat Face Detection in Node.js
- Arduino with Johnny-Five 101 - Video Tutorial →